
A first-aid kit is a good start, but if you’re heading off the beaten path or diving deep into the woods — especially in places that could have extreme weather — you really need to amp up your first-aid kit by turning it into a lightweight survival kit.
What does this mean? It means that you need to have a few extra items — beyond first-aid kit bandages and medicine — that will give you a heckuva lot better chance of survival. If you’re backpacking, hiking, fishing, or hunting, you should already have some core gear for survival in case you get lost or trapped by bad weather. Because I’m usually outside doing one of these outdoor activities, I can keep my survival kits pretty lean.
If you’re mountain biking, on the other hand, you might want to pay extra attention to having a knife, and if you don’t already carry a knife every day, you better get one — check out “Gear Guide: 22 Best EDC Knives for the Money” to learn more and choose the right EDC knife for you.
Moving on, what do you really need to survive for a few hours or days? The answer is pretty simple: shelter, water, and fire.
First, you’re going to need to be able to stay warm. A cool rain in 45 degree weather can be a recipe for hyperthermia — it doesn’t have to be snowing to be dangerous. Or, if you’re in a desert, you’ll need protection from the sun and heat. This means you’ll need shelter.
You can survive for days with little or no food, but a lack of water can lead you to death through disorientation or straightforward dehydration.
And fire? Fire can sterilize water, keep you warm, alert help to your location, soothe your freaked-out soul, and cook some food.
So . . . what do I do to turn my first-aid kits into lightweight survival kits?
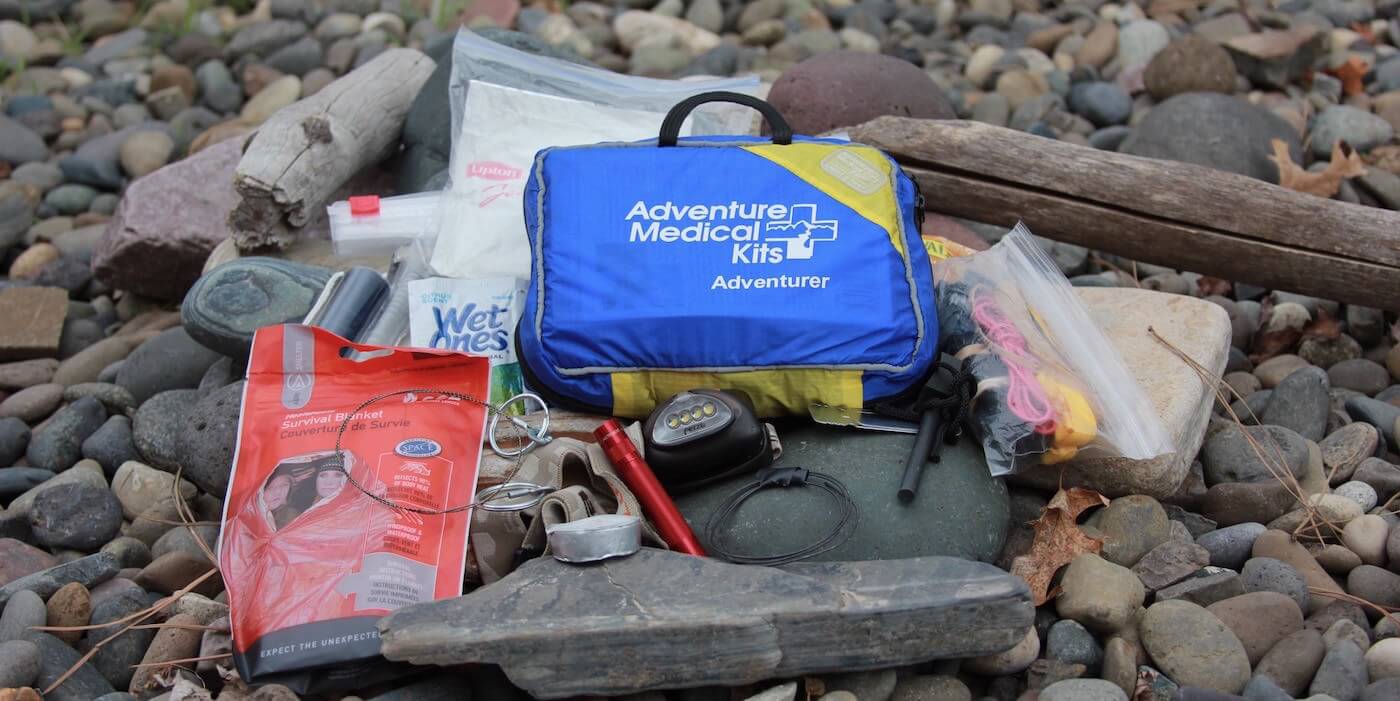
In addition to my EDC knife that is carried in some pocket on my clothing, I add some must-have items to a backpacking first-aid kit — here is what I usually add:
- matches, either waterproof or placed in a waterproof container
- a space blanket, emergency bivy sack, or ultra-light tube tent
- cheap, thin plastic poncho (or a black lawn-and-leaf garbage bag)
- ultralight multi-tool
- water-filter straw
Optional items:
- small cable saw
- small candle and tinder to help start a fire
- small pack of dried Lipton chicken soup mix
- a granola or protein bar or fruit leather
- headlamp or small flashlight
- bit of wire
- a couple of extra shoelaces or some paracord
- fish hooks and fishing line
- wet wipes
- a couple of paper napkins
- hand warmers
- water purification tablets
The goal is to pack only the items that will drastically increase your odds of survival — depending on where you’re going and the weather conditions — without becoming so heavy that you don’t want to pack it at all. Lighter is usually better because you’re less likely to leave it behind.
If you have a first-aid kit that has enough room in its own bag, simply tuck your extras into that first-aid kit bag. If you don’t — and I usually don’t — I slip it into a clear heavy-duty gallon-sized zip-closed freezer bag. Then I squish out the air and seal it. Why these bags? They’re cheap, pretty much waterproof, and because they are clear, I can see through it to know what’s inside. Better yet, if I get hurt, someone else can see through it and see what’s inside.
In case you’re wondering, I usually overpack here because I tend to go into the woods with other friends, sometimes with kids, so I like to be a little extra prepared. Remember, your lightweight survival kit can change in size and weight depending on your outdoor trips — I add and reduce depending on where I’m going and with whom.
Best Survival Kit Trick?
Remember that black lawn-and-leaf garbage bag on the list? You can poke a few holes in a black plastic bag for your head and arms to wear it like a rain-proof vest and/or stuff it with dry grass for insulation. You can cut it apart to make a rectangle and use it as part of your shelter to shed rain — or create shade. If you had to and were careful, you could use a portion of it to carry water. (Funny aside: On my hike up Mount St. Helens in some bad weather, we saw a guy wearing a black garbage bag.)
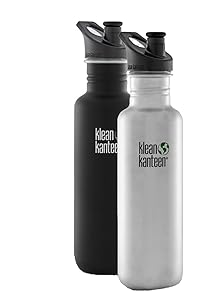
A close second to the black plastic bag is always taking along a lightweight stainless steel water bottle. Why not just a big hydration bladder? You can boil water in a stainless steel water bottle to sterilize it — or make soup.
Convinced? Order a pair of Klean Canteen Classic Stainless Steel Bottles now — and always toss one in your backpacks.
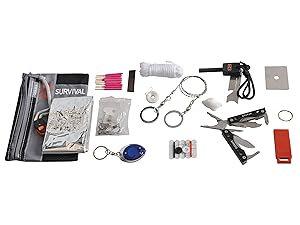
Pre-Configured Lightweight Survival Kits:
VSSL makes super-cool aluminum tubes that are packed with survival gear. Check out:
